
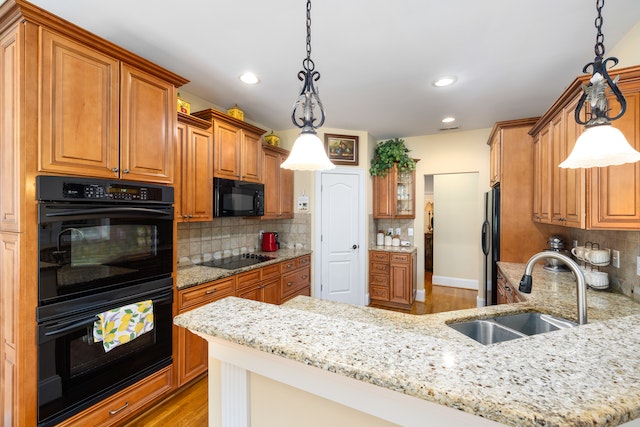
So, you want a new look in your kitchen? Refinishing your kitchen cabinets is a fun way to update the look in your kitchen without the cost of buying new cabinets. However, refinishing your kitchen cabinets requires careful preparation, sanding, priming before you can even start painting or staining. You need to know what you’re doing before you start. Do you stain or paint? Staining cabinets gives the cabinet a more natural appearance and brings out the natural fibers and patterns in the wood. Staining is relatively easy. Painting them matches any color scheme you want in your kitchen and gives them a more polished, finished look. L.W. Winslow Painting, Inc. outlines what is involved in refinishing cabinets below. This is Part 1 of a 2 Part series.
Is Painting or Staining Kitchen Cabinets Safe?
Prepare yourself and be safe – You will need tools and supplies including drills, screwdrivers, hammers, drop cloths or tarps, sandpaper, primer, cabinet paint or stain, brushes or rollers. Your health and safety are important when refinishing your cabinets. At all times wear a mask and gloves and ensure you have plenty of ventilation. Also, you should clean up after yourself as much as possible. It’s going to be a messy job and the less mess laying around the better it will be to work.
Steps to Refinishing your Kitchen Cabinets
Step One: Prepare the Space in your kitchen
Remove everything from the room that doesn’t need to be there. Clean off the countertops and remove items in the cabinets where you will be working. Remove the stove, microwave, dishwasher, and other appliances that might be in the way. Removing these obstacles helps later when you need to move around in tight spaces. Lay down drop cloths or tarps on the floor near the cabinets you plan to refinish. Covering the floors will help keep them clean and protected from being damaged by the paint, stain, and dust. Also cover other areas you don’t want damaged.
Step Two: Label Cabinet Doors
All the doors look the same, but some vary slightly in shape and size, and some only fit in certain places in the kitchen, like a puzzle. It may seem unimportant but labeling the cabinet doors will save you time later. Apply painters’ tape on the cabinet face and back of the door, and mark them with matching numbers. As you work with the cabinets you can move the tape around as needed making sure you don’t mix up the labels from door to door.
Step Three: Remove Doors, Shelves, and Hardware
Remove the doors and drawers with the help of a screwdriver, unscrew hinges holding the doors, then remove the door. Every style of cabinet hardware is different so take time unscrewing. Saving the hardware if reusing and discarding and replacing any hardware that is old or stripped. Then remove the shelves. You will not remove screws or nails that hold the cabinet to shelves this may cause damage to the cabinet itself. It’s important to take care of your cabinets otherwise you may have to replace the cabinet instead of refinishing.
Interior & Exterior Painting & More in Amagansett, Bridgehampton, East Hampton, Hampton Bays, Montauk, North Haven, North Sea, Noyack, Shelter Island, Sag Harbor, Shinnecock Hills, Southampton, Springs, Water Mill, Westhampton & Westhampton Beach, New York
In part 2, we go over sanding surfaces and filling holes; applying stain or primer and paint and putting cabinets back together. If you want a professional finish to your cabinet refinishing, you really should call a professional like L.W. Winslow Paining, Inc!